Get Started with Ansible for DevOps on AWS EC2 for Automation

In this guide, we will discuss using Ansible for DevOps on AWS EC2 for automation.
Introduction
Whether you are a software engineer, a DevOps engineer, or a system admin, you must have found yourself configuring and managing application servers, deploying and configuring several servers for a software application. You probably have had to face the stress of typing out shell commands in the terminal one after the other. Or to repeat a sequence of commands while testing a server.
Ansible is a solution to these problems. It makes the processes of server configuration, dependency installation, etc., easier and more efficient, especially if you are comfortable with shell scripting and YAML syntax.
This article will introduce Ansible as a DevOps automation tool for Infrastructure as Code. First, you will learn the creation of servers on AWS Cloud. After this, I will introduce Ansible terminologies like inventories, playbooks, and YAML files. More importantly, you will learn how these tools are written and used in Ansible.
What Ansible is and How it Works
Ansible is a powerful IT automation tool for configuration management, application server management, application deployment, and infrastructural orchestration. With Ansible, you will experience less stress working with and managing servers, no matter how much they are.
Ansible has playbooks that you can use to store scripted steps that Ansible will execute to reach a desired outcome. This does not mean that Ansible is a scripting language — it has a human-readable syntax that breaks up the complexity of shellcode/scripts.
Ansible playbooks contain modules or commands executed in the order they were written. Typically, it starts with a “tasks:” module, has the “name:” of each task you want to do, sets the “command:” to run the named task, and is followed by any relevant step.
Ansible playbooks are written in the YAML file extension, meaning you should know how YAML files are written. To carry out any automation task, you have to create a YAML file and fill it with the steps required to automate that task. A typical task might involve:
- downloading the dependencies for a software package
- downloading the package afterward
- testing the installation was successful
- starting an instance of the software for its intended use.
After editing the YAML file, it is run with the ansible-playbook command. The most important feature of Ansible includes:
- the human-friendly syntax
- no dependencies aside from SSH key pairs and Python
- it is open-source
- has built-in modules for all applications.
Installing Ansible and Lab Setup
The lab environment for your server(s) can either be local or cloud-based. If you do not want to spend money using a cloud-deployed VM, you can install Vagrant locally. However, you can also use the free-tier option of some cloud-based virtual machine instances like AWS. Whichever you choose, you must have Python pip3 installed.
Launching a Local Virtual Machine for Vagrant
Vagrant is an open-source server provisioning tool for spawning and managing virtual machines. Local development is safer, faster, and cheaper than remote development. To run Vagrant on your local machine, you must download VirtualBox and Vagrant. After booting Vagrant in a box on VMware, you will need to create a “Vagrantfile” (a Vagrant config file) for your working operating system.
A Note on OS: The process of installing Vagrant depends on your operating system. This article uses the Kali Linux operating system. Thus, the commands are specifically for Kali.
# install vagrant box for kali and for virtualbox
$ vagrant box add kalilinux/rolling
$ vagrant box add kalilinux/rolling --provider virtualbox

# list all the boxes installed
$ vagrant box list
Create a directory for storing Ansible playbooks. We will name the directory ansible4devops and inside it, run the following command:
$ Vagrant init kalilinux/rollingThis command generates the Vagrantfile. You can edit the file as you wish and then run the following command to start Vagrant:
$ Vagrant up

# to set the host to SSH connection, use the following command;
$ vagrant ssh
$ ssh [email protected]
Running the Vagrant up command for the first time would make Vagrant automatically provide a newly-mint virtual machine using the provisioner you configured in the Vagrantfile.
Launching a Cloud-deployed Virtual Machine on AWS
For the sake of this tutorial, we will use an AWS cloud-deployed RedHat Enterprise Linux virtual machine of the “t2.micro” instance type. You can do that on an AWS EC2 instance:
- Navigate to EC2 Instance and select Launch a Virtual Machine.
- Select the type of machine and the instance type you prefer. We will create two instances.
- Select Storage Size and leave it as the default 10GiB.
- Select Add Tags and leave it as default.
- Select Configure Security Group and leave it as default. Ansible makes its connections using SSH key pairs mostly, although you can use normal passwords.
- Click on Review and Launch, and finally, Launch to start the virtual machine.
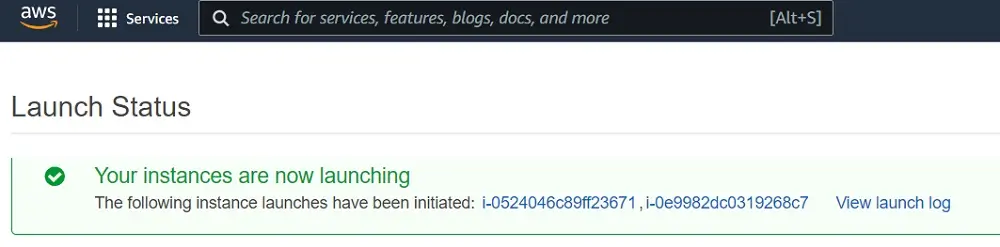
After successful completion of these steps, you will see the Launch Status window saying your instances are launching.
Launch Status Window
Once they are in the Running state, you can click on them to start using them. You can see that by clicking the View Instances button at the bottom.

Connect to both instances using the Instance Connect option or the SSH Client option by ticking each instance and clicking Connect separately.
People often say that Ansible is an agentless platform that requires no dependencies. However, it relies on Python for its installation. Start a terminal on your virtual machine and run the command below:
$ pip3 install ansible
# check the version to confirm proper installation
$ Ansible --version
You must use several machines to create servers or workloads that Ansible would manage. This article would assume that you have a Control Node or Machine and four other servers:
- Two web servers
- Two database servers
You have seen how to start a virtual machine, and you can simply write a backend logic to start a simple server for both instances. The entire software architecture comprises database servers, application servers, mail servers, file servers, etc.
[ansible-web-server]
18.118.107.144
Navigate to the default location for Ansible and create a file there:
$ sudo mkdir /etc/ansible
$ sudo touch /etc/ansible/hosts
Ansible Inventories
Ansible Inventories describe the systems and processes you want to manage using Ansible commands. For example, you configure an inventory file to target a host. In this section, you will learn how to configure and use an Ansible inventory.
An example of the use of Ansible Inventory for multiple servers is as follows:
# Application server
[app]
192.120.20.4
192.120.20.5

# Database server
[database]
192.120.20.6

# Grouping
[all:children]
app
database
Add the above script to a file named playbook in the /etc/ansible/hosts folder. The first block groups the application servers into a group called “app.” The second block puts the database server into a “database” group. The third block creates a new group that nests the app and database groups.
If you run the command below, you will get the details of all servers in Ansible’s parallelism nature:
$ ansible all -a “hostname”Ansible Playbooks
Ansible Playbooks are the tools to automate IT tasks in Ansible. They are composed of a list of tasks called plays that are run on a particular server or group of servers.
Ansible playbooks are written in the easy-to-understand YAML syntax. Playbooks may consist of other playbooks; they make Ansible a powerful server management and configuration tool.
The wide adoption of Ansible by sysadmins and/or DevOps engineers results from the ease of converting shell scripts or commands to Ansible plays.
Below, we will install and configure the NGINX server using an Ansible playbook. Create a playbook named nginx-playbook.yml and paste the following:
- name: install and config webservers
    hosts: webservers
    gather_facts: True
    sudo: True
    tasks:
        - name: install NGINX
        - apt: name-nginx
        - name: install config file
            template: src=nginx.conf.j2
dest=/etc/nginx/ngingx.onf
                notify: restart nginx
    handlers:
        - name: notify nginx
            service: name=nginx
state=restarted
To run the Ansible playbook, run the command below in your terminal:
$ ansible-playbook node-playbook.yml This is easier than using step-by-step commands on the terminal:
$ sudo apt-get update
# install nginx
$ sudo apt-get install nginx
# verify installation
$ sudo nginx -v # nginx version: nginx/1.19
Conclusion
This article introduced the Ansible configuration management tool for automating IT processes. You learned how Ansible inventories are written, what Ansible playbooks are used for, and how they are written.
To further deepen your knowledge about Ansible for DevOps, you can use the official Ansible documentation by RedHat — the organization that maintains Ansible.

MacBobby Chibuzor is a Robotics Hardware Engineer and a Tech Polyglot. He also has practical experience in Software Engineering and Machine Learning, with an interest in embedded systems and Blockchain technology. In addition, Mac loves to spend his free time in technical writing.